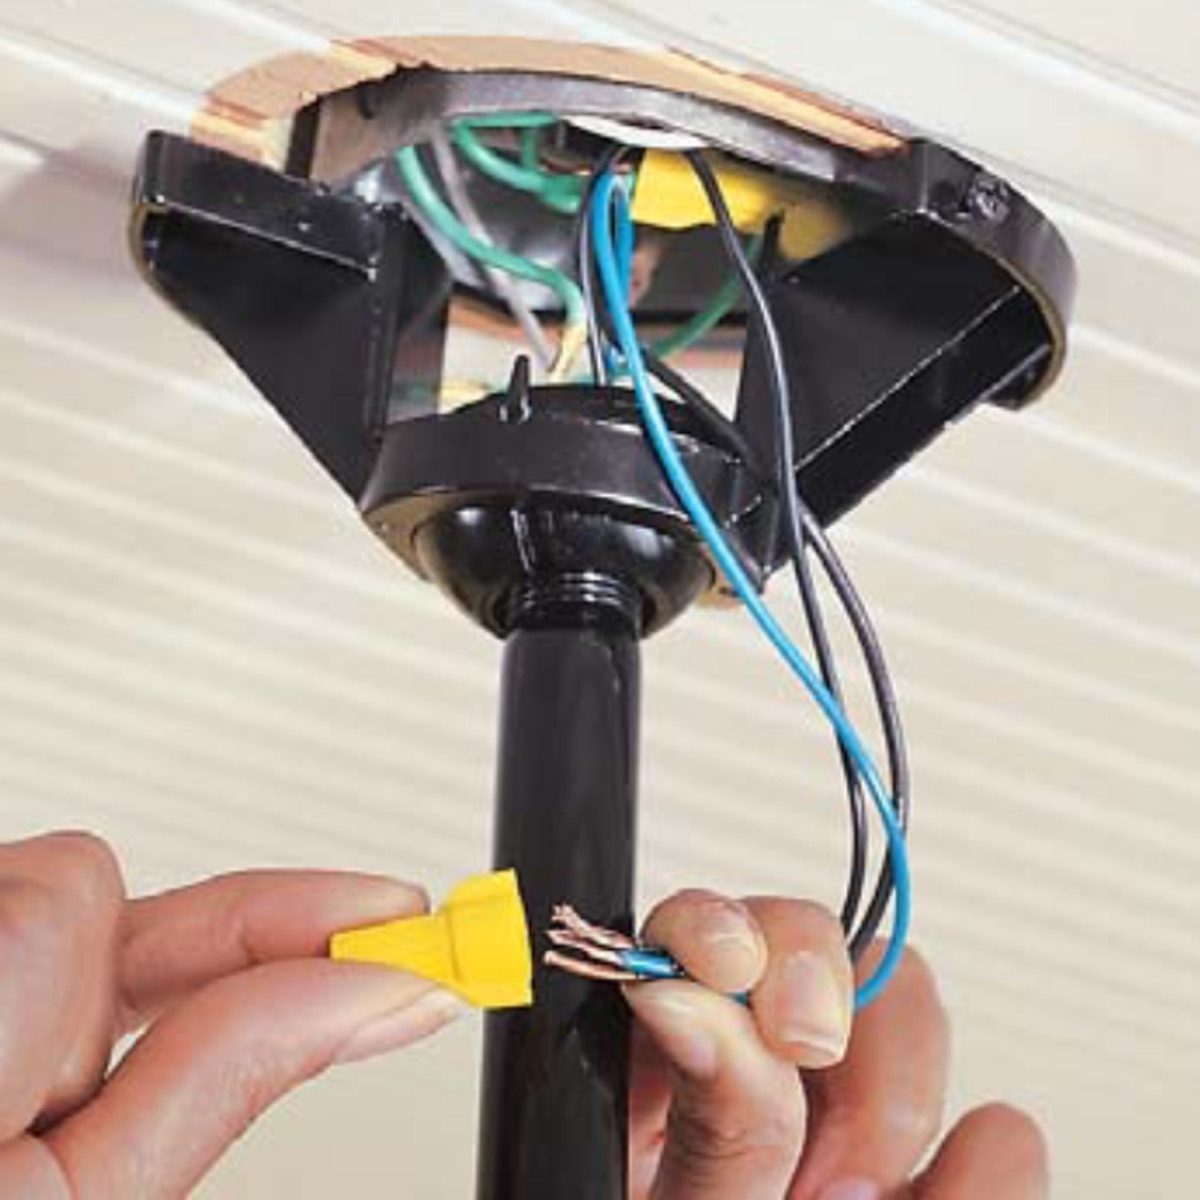
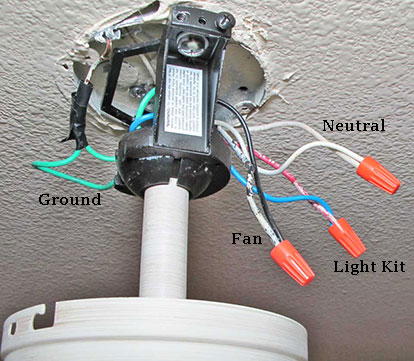
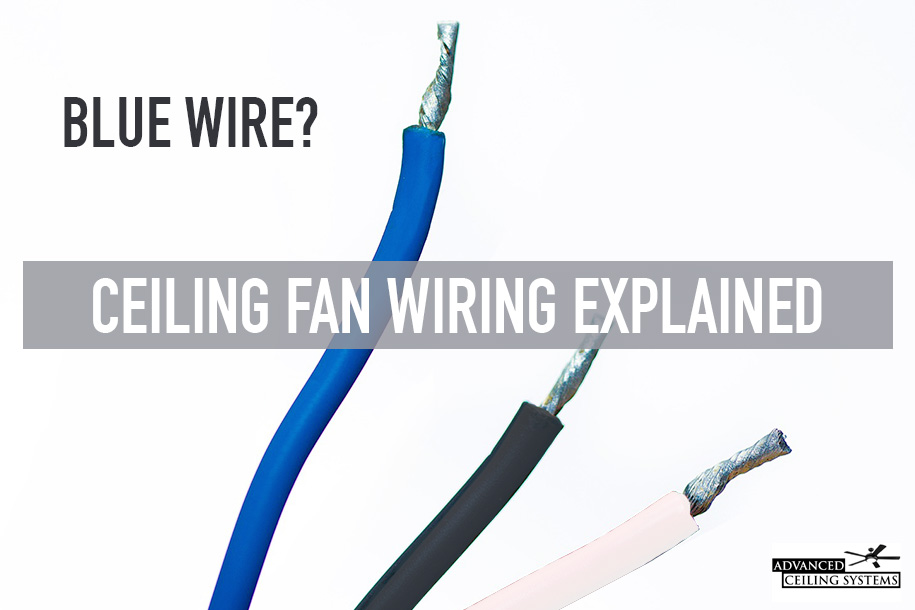
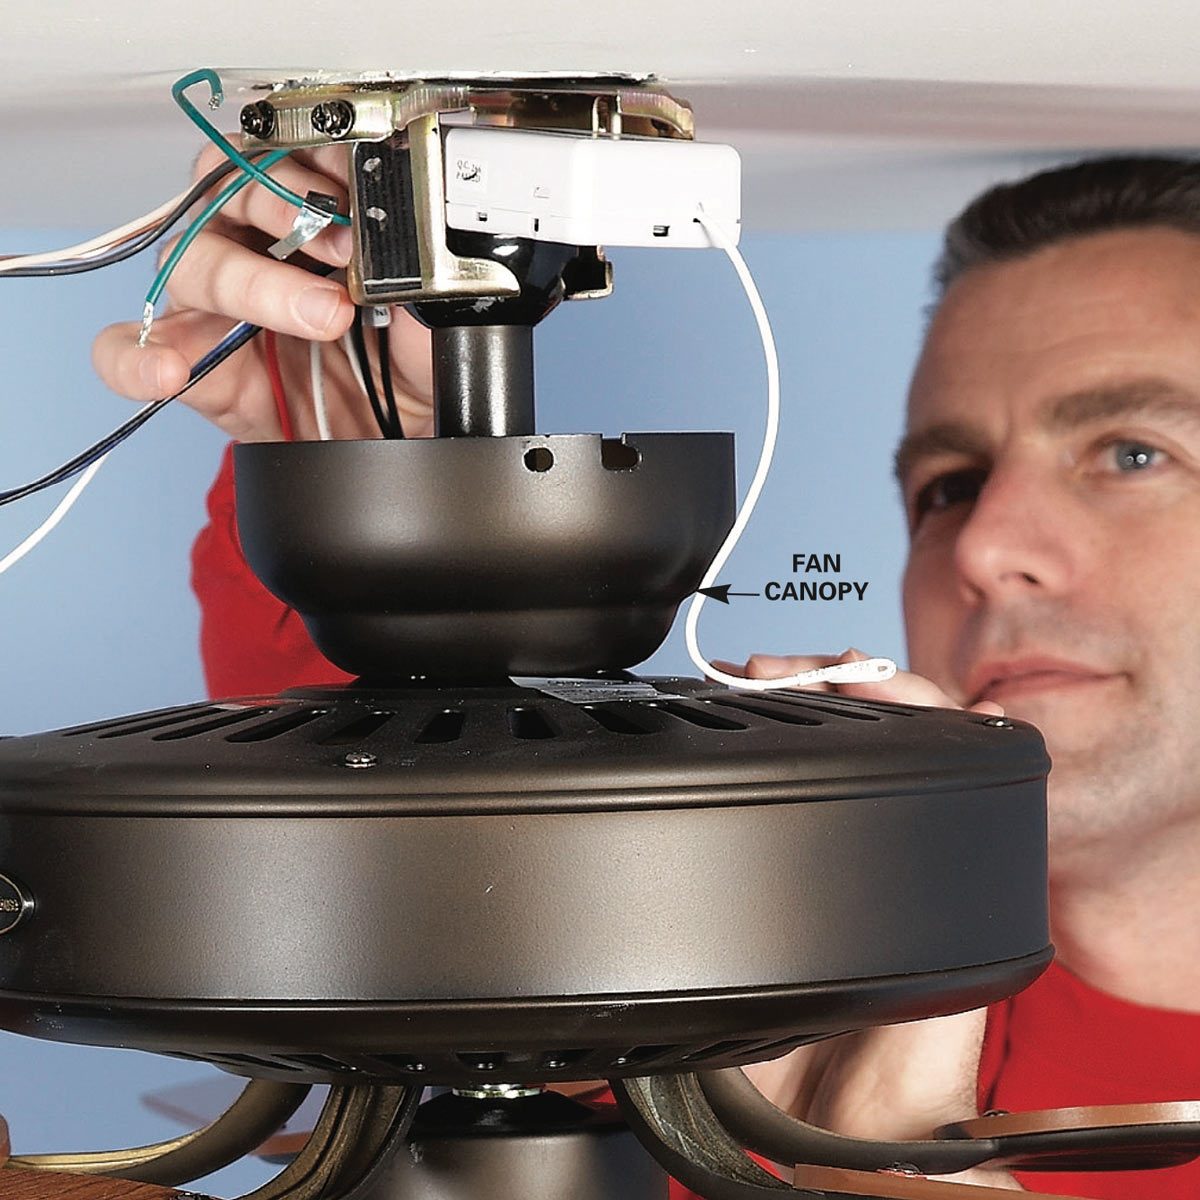
The black wire is pig tailed with two leads one for the black wire for the fan one for the blue wire for the light. For ceiling fans without lights follow the same step.

Harbor Breeze Fan Switch Wiring Diagram C3 Wiring Diagram
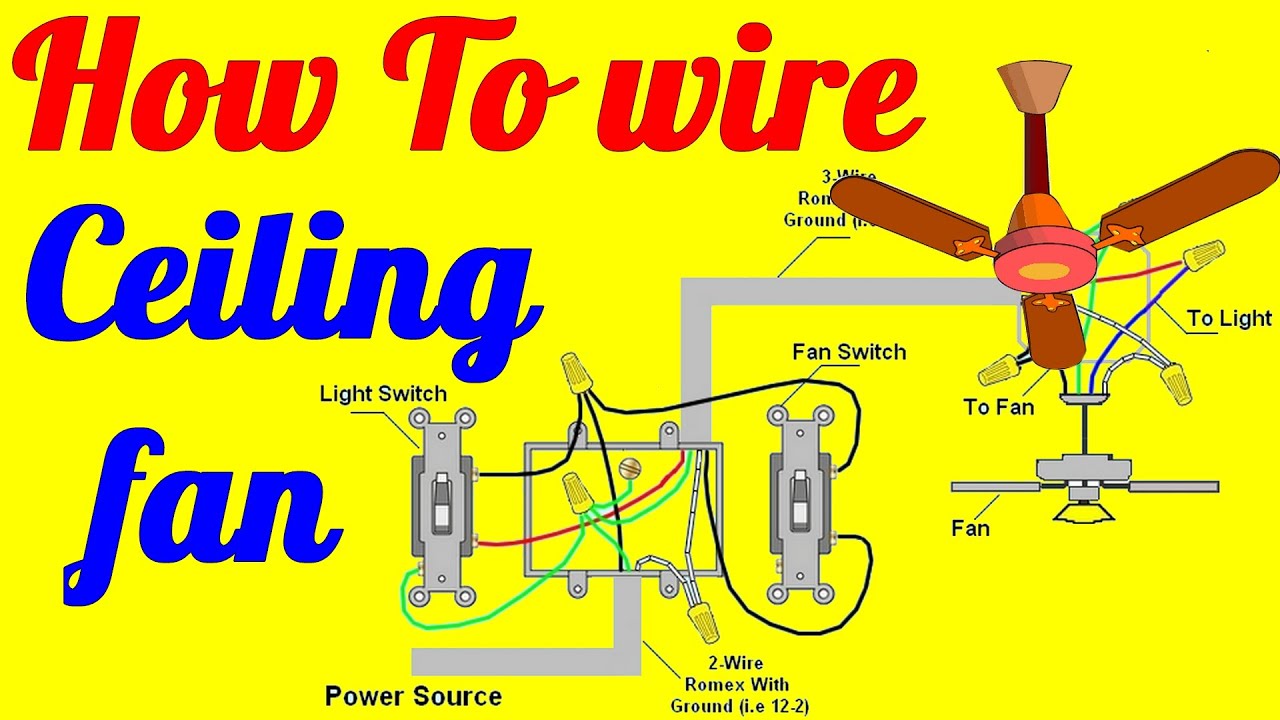
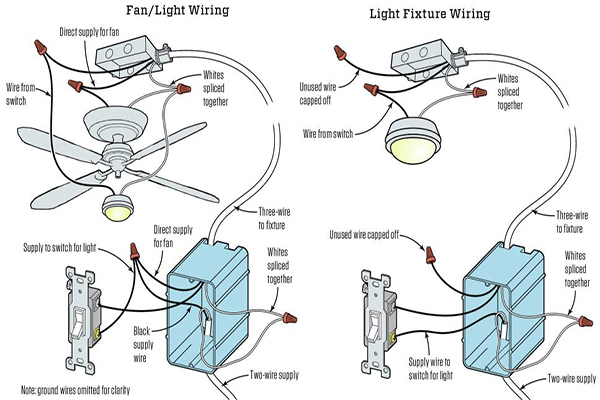
How to wire a ceiling fan to an outlet. This will allow you to add a light kit later on without having to rewire the fan. Snip the plastic and slide it off to expose the copper wires. Connect the green wire to your household ground wire copperbare wire. Depends on personal level experience ability to work with tools and access to the switched outlet wiring and the proposed location for the ceiling fan. Connect the black wires together. Use a stepladder to reach the wires in your ceiling and carefully cut away the plastic coating about 2 inches 51 cm from the end of the wires with a wire cutter.
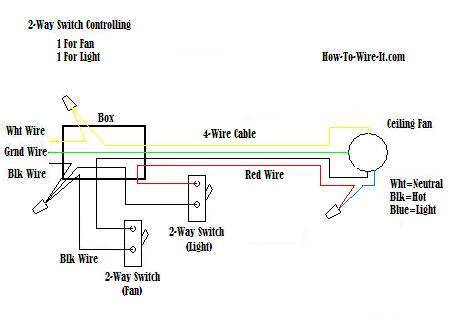
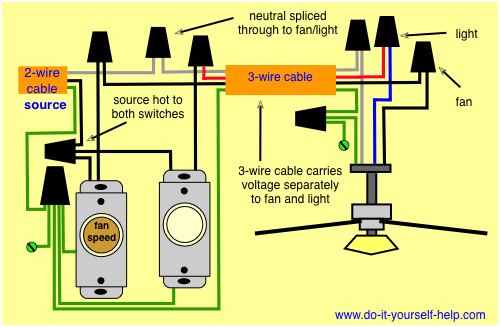
Here is the typical wiring for a ceiling fan that will be powered from a wall outlet. Connect the two black pigtail wires to the bottom brass screws on the switches by placing them in a clockwise direction around the screws and tightening the screws down on them. Extending the wiring from a switched wall outlet provides the capability for the switch to control the ceiling fan separately by itself switched with the outlet or to be operated only by the pull chains on the ceiling fan. Connect the white wires neutral wires from your fan and ceiling together. Connect the red and. Repeat the process on the wires coming out of your fan.
With the described wiring scenario the ceiling fan cable should be installed to the wall outlet that is controlled by the wall switch. The power is spliced at the outlet and extended up to a double switch box. The white neutral wires are spliced together. Lastly connect the blue wires together or the blue wire to the black wire for lights. Identify the switched outlet circuit turn it off and tag it with a note before working with the wiring.
Gallery of How To Wire A Ceiling Fan To An Outlet