Look for the blue wire in the switch housing at the bottom center of the fan and beneath the fan motor and blades. At the fan splice the wires matching the colors of each and connect the ground wire to the grounding terminal.
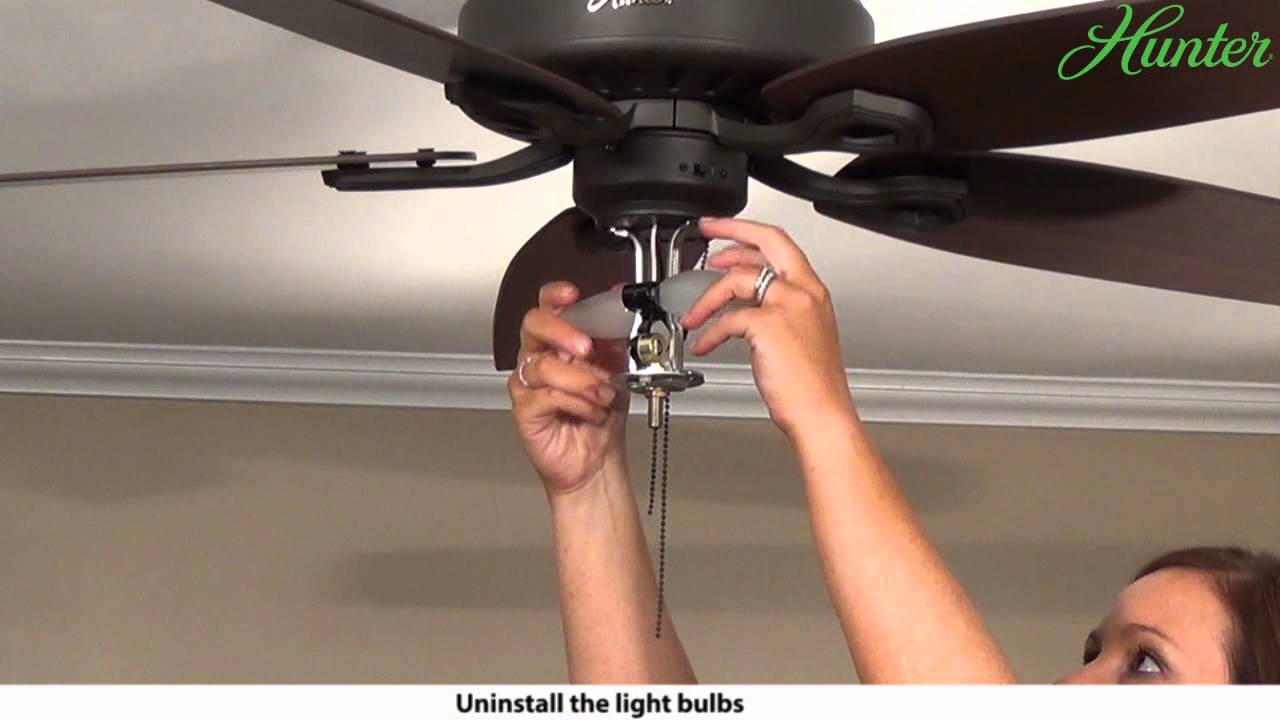
How To Remove A Light Kit From Your Hunter Ceiling Fan 5xxxx Series Model Fans
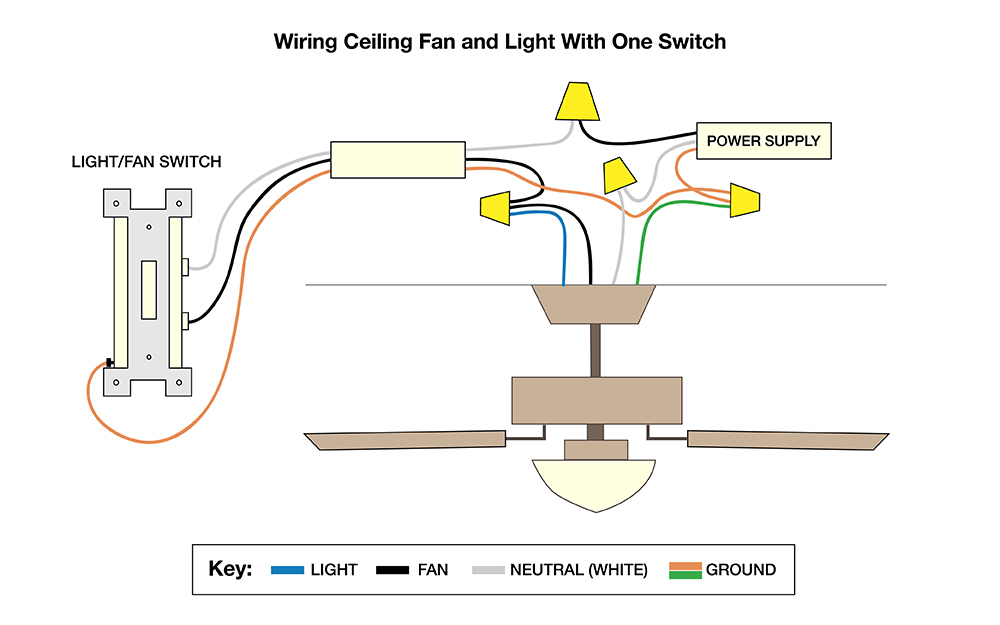
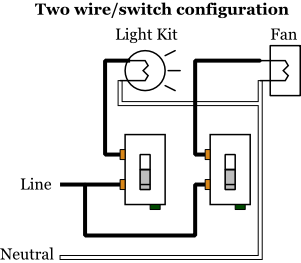
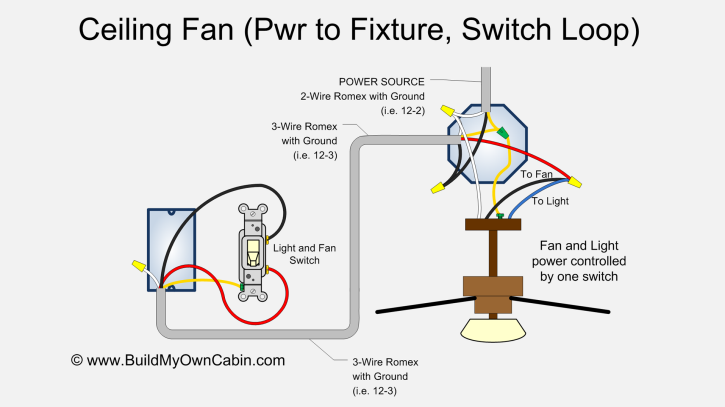
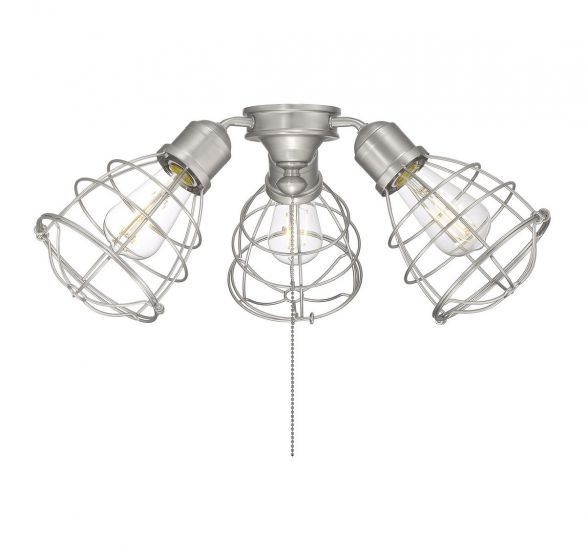
How to wire a ceiling fan with light kit. Splice the source neutral to the white cable wire. Twist a yellow or orange. Match the blue wire to the black wire from the light kit. In this arrangement a light fixture and exhaust fan are wired to the same source. Connect the red wire in the ceiling to the black wire in the light kit and the black wire in the ceiling to the black wire in the fan. If not clearly labeled a pair of blue or black hot and white neutral pigtails are the two wires youll need to power the kit.
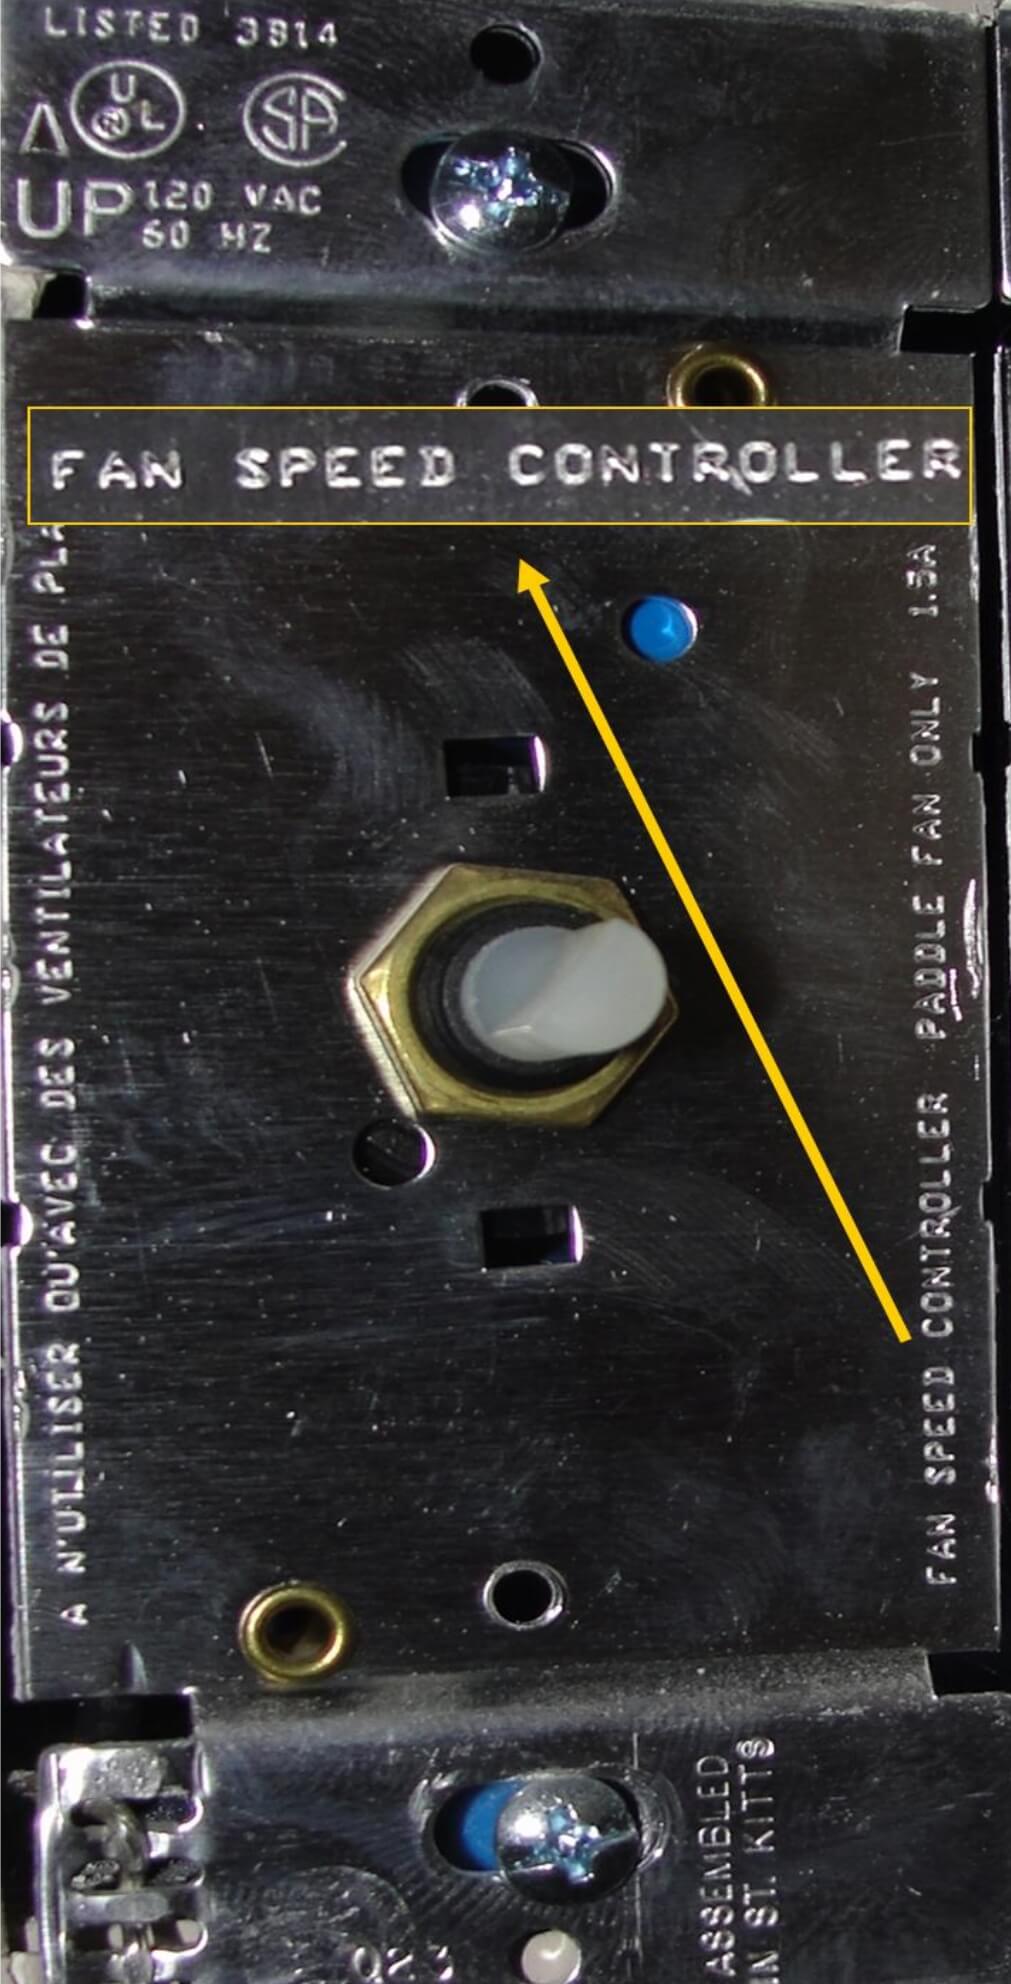
Switching the light and fan from separate switches two switches this is the most versatile way to electrically wire a ceiling fan with a light kit. It allows for separate control over both the fan and the light in the room. Connect the green wire to your household ground wire copperbare wire. Wiring a ceiling fan with light is definitely a diy job that anyone comfortable doing basic electrical work can tackle. Once you understand the ceiling fan wiring colors and even if youve never attempted to wire a ceiling fan the steps involved are very straightforward and accessible to even the most casual diy handyman. There are also lots of really convenient switches that put this dual control into one neat little package.
Typically there are two wires with a big white label that reads fan light kit wires. Wire the source ground to the ground wires for the switch and the fan. Tuck the wires back into the box. Once the cover plate is removed it provides a connection for the light kit. Connect your white wires together and secure with wire nut.
Gallery of How To Wire A Ceiling Fan With Light Kit