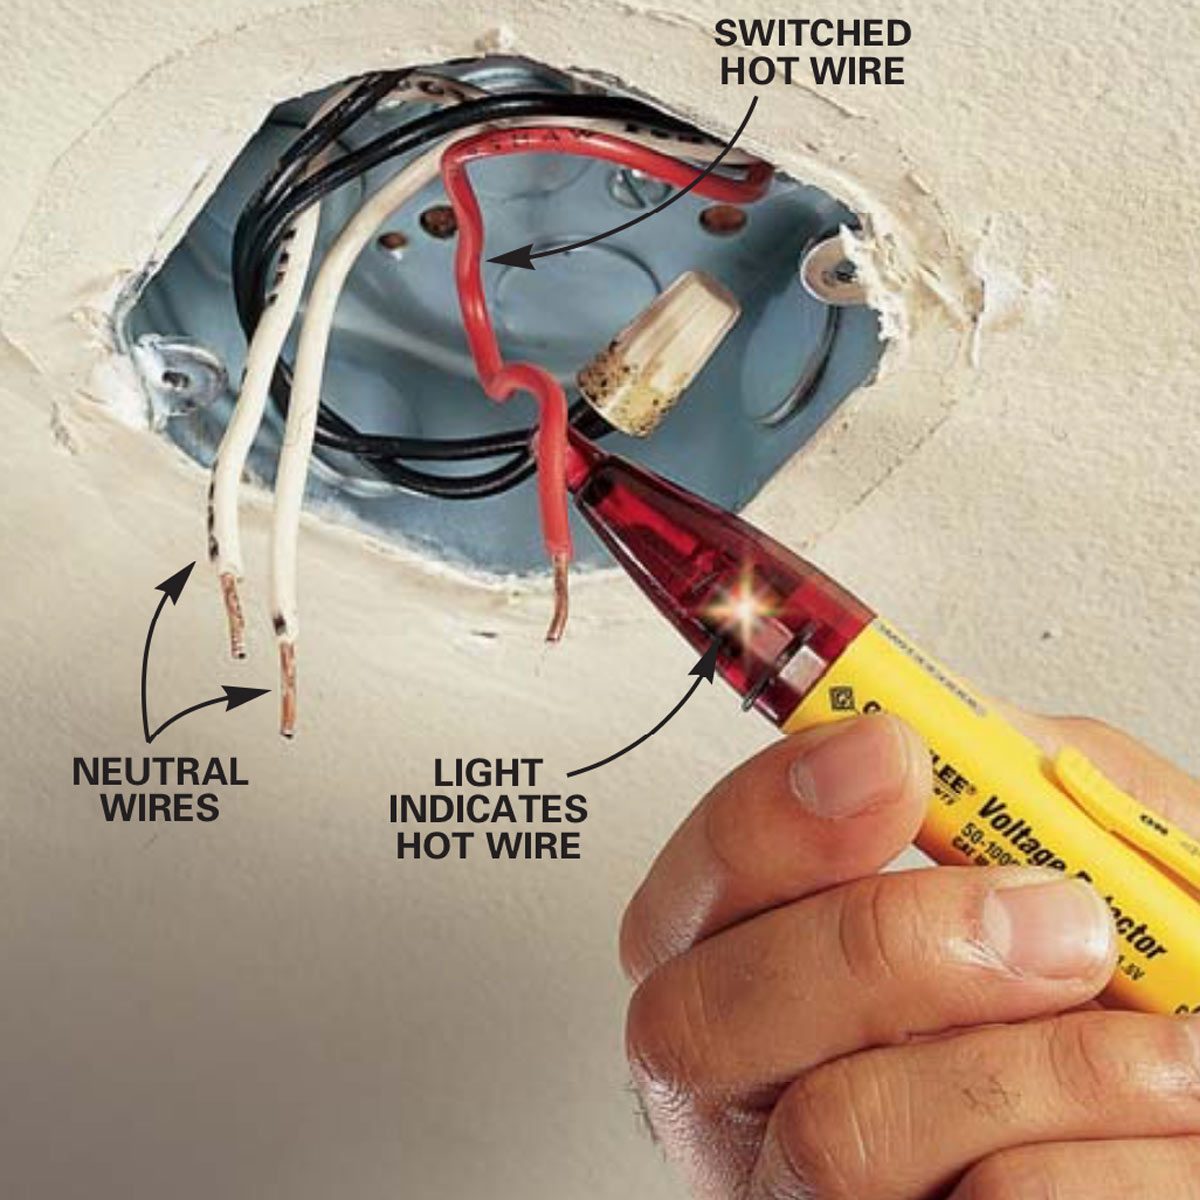
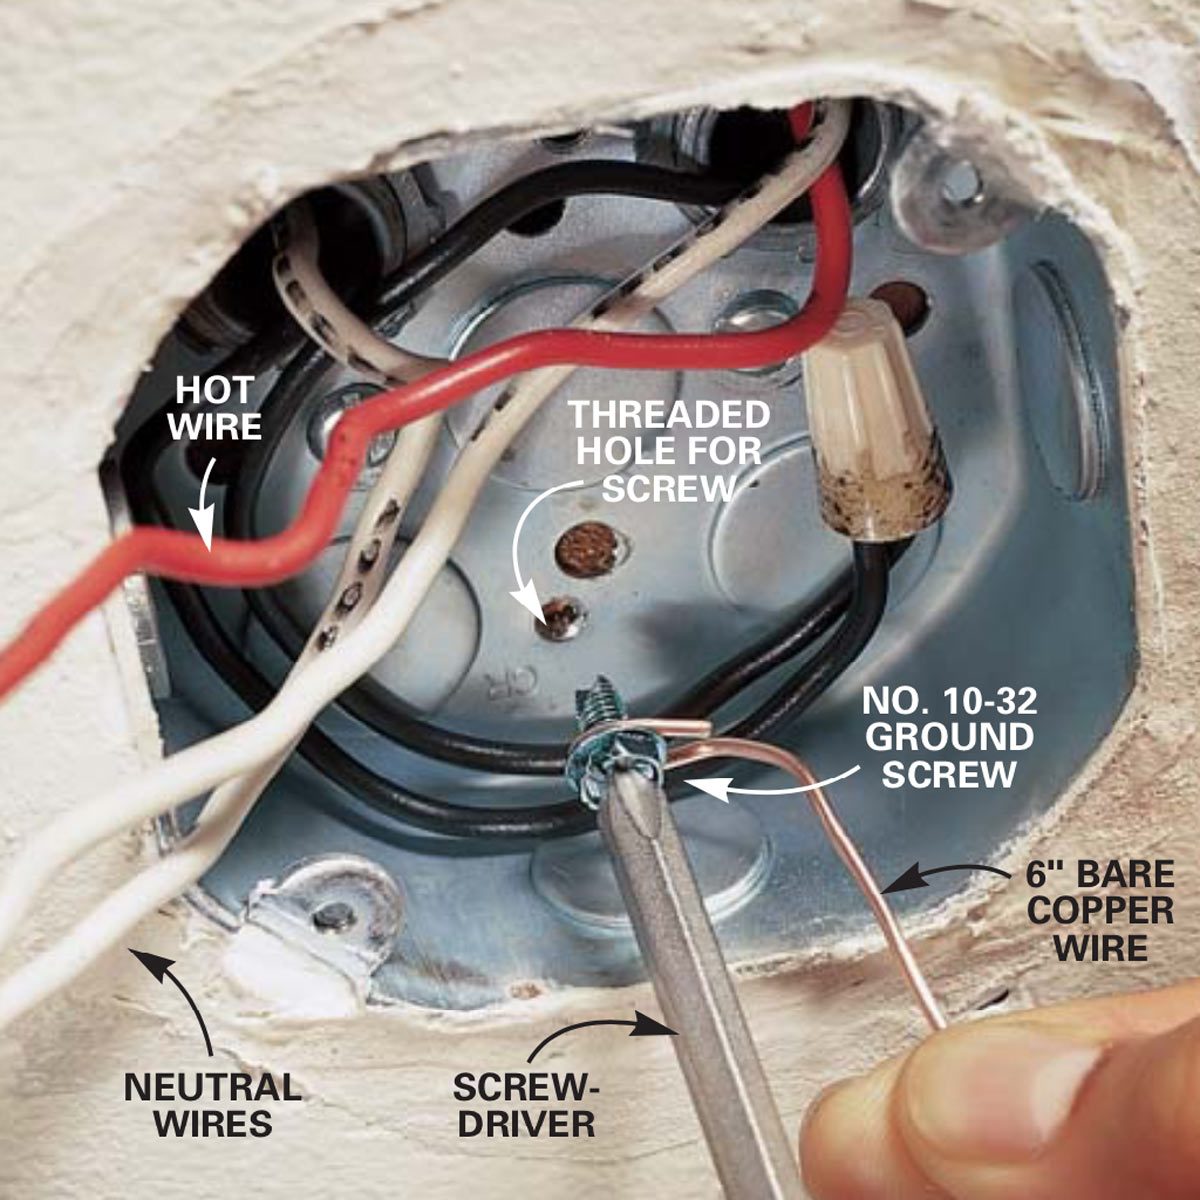
You can also use them for elevators and escalators 62011c class 1 control and power limited circuits 72527b and nonpower limited fire alarm circuits 76027b. Ground neutral white and two hot black and red.

Electrical Basics Wiring A Basic Single Pole Light Switch
4 wires light fixture. After youve disconnected the wires the old light fixture is generally free to be removed. My light only had ground green neutral and hot. Theres no universal way. Be sure to. The other black and white wires are the electrical circuit for the switch. For class 1 control circuits follow.
Per 40210 and 40211 you can use fixture wires to connect luminaires but you cant use them as branch circuit conductors fig. Mount the new fixture. Connect the new wires. If the light can be turned on or off from switches at each. Attach the new light fixture to the ceiling mount using screws bolts or whatever other style of hardware is provided. Disconnect the wires and move the old light fixture to a safe place.
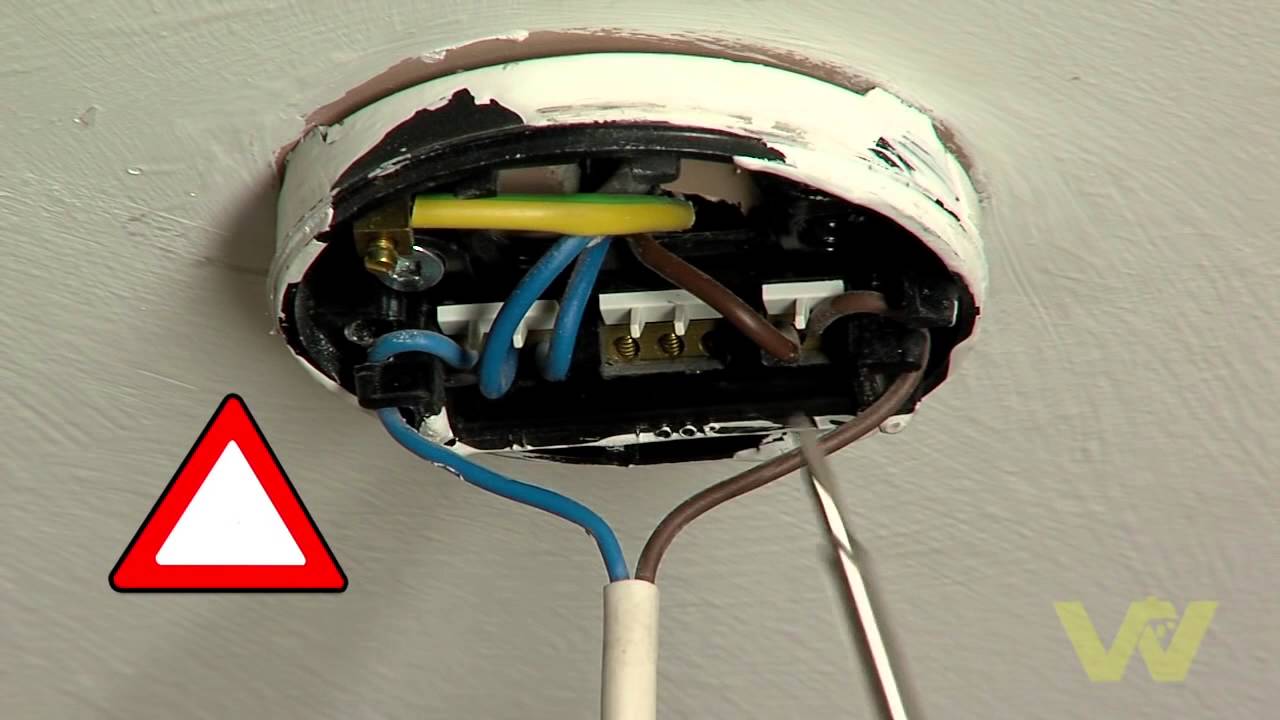
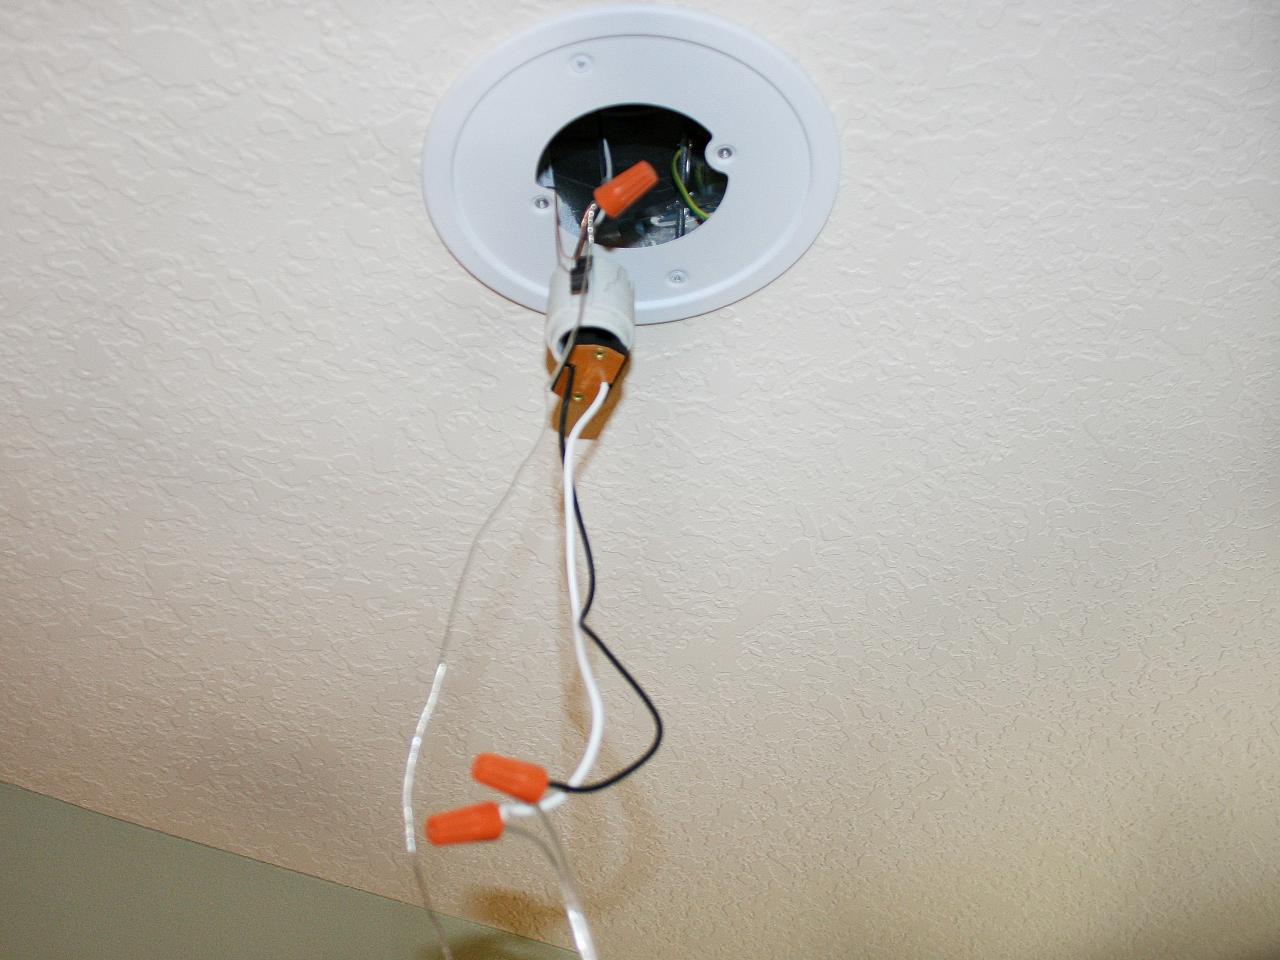
One of the black and white wires goes to the light fixture. Bring out the new light fixture and match the differently coloured wires to the wires hanging from the ceiling using the provided connector system. Remove old light fixture. Im replacing some old light fixtures with recessed light fixtures and when i removed the old fixtures i found that there are 4 romex cables in each ceiling box. If youre using fixture wires for motor control circuit taps follow 43072a. Again this may vary given the light fixture youre working with.
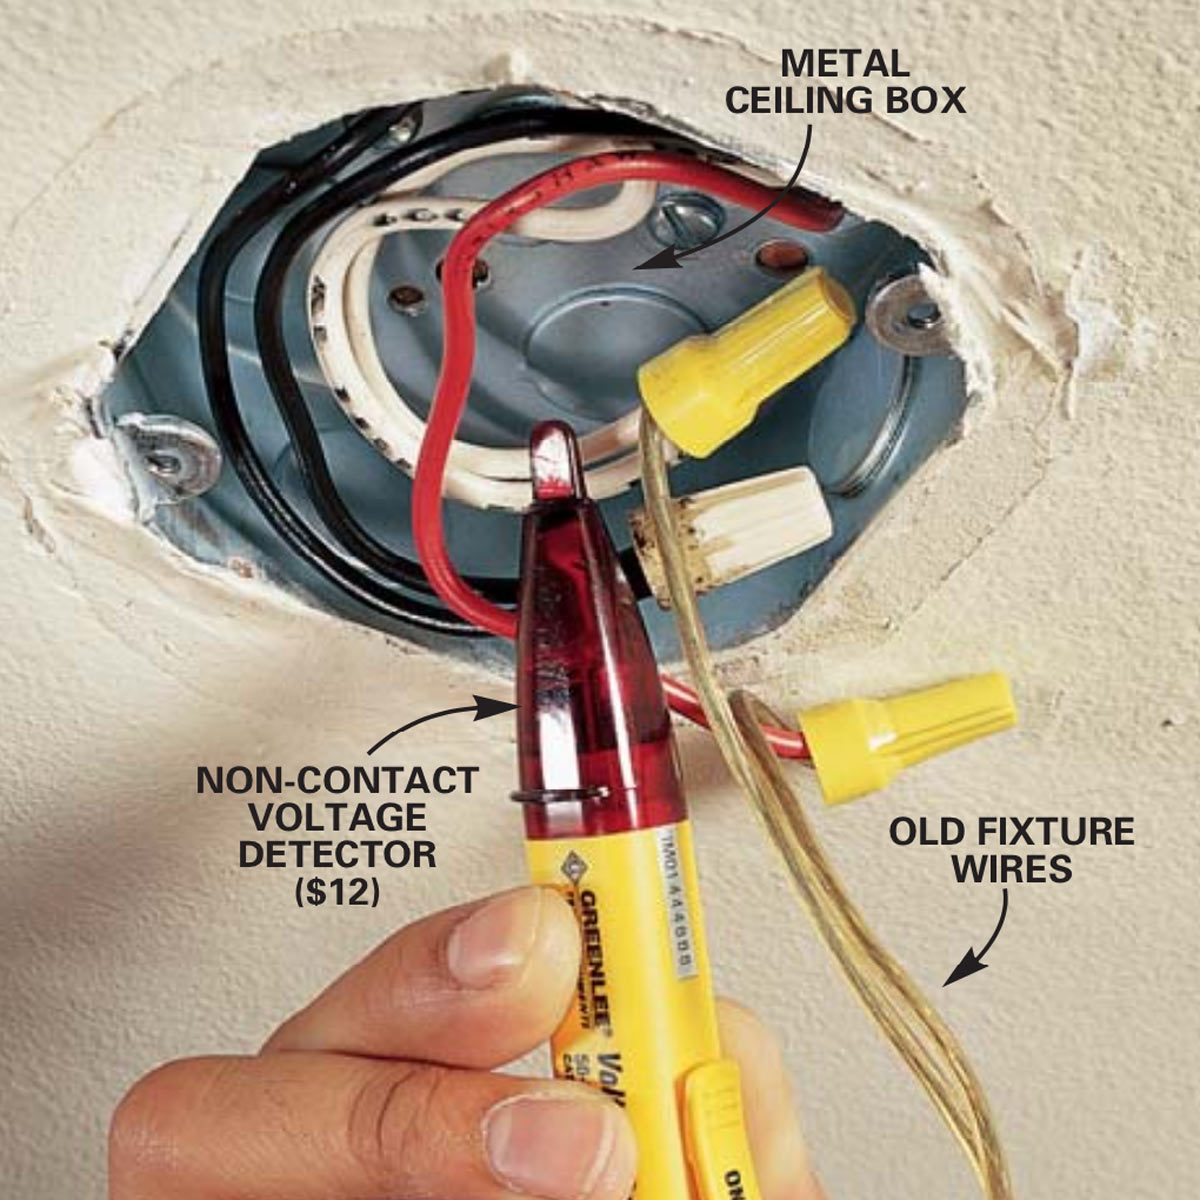
At this time you can install light bulbs and turn the breaker back on. My recessed light fixture boxes are small and theres no way i can fit 4 cables they have 2 knockouts and are about 9 cu. When the fan was removed i had four wires. You must protect them against overcurrent per 2405. Once the wires are disconnected unscrew here and the fixture is off the ceiling. Unscrew the wire connectors the red parts in the image above and separate the fixture wiring from the ceiling wiring.
Turn on the power. One for the light one for the motor. Same image as above this one pointing out how to remove the light fixture.
Gallery of 4 Wires Light Fixture